I had a realization today. Well, not really today...it's been in the back of my mind since I decided to buy the Handiquilter longarm machine. I've been piecing the back of Matt's tshirt quilt this week knowing that somehow I had to make the back 5 inches larger all around than the front to use the longarm machine. The extra is needed when the quilt top and back are rolled onto the frame. The problem is how do I make sure the back lines up with the front exactly how I want it to?
Before I answer that question, I want to share another tip. It's really my short cut because I'm inherently lazy and I take as many shortcuts as I can. I've been known to reconfigure a pattern if I see a shorter (smarter?) way to piece it together. A lot of quilters that I know pin their layers together before they sew to make sure it lines up especially if they are sewing a long piece onto a huge top. The top tends to pull toward the floor because of the weight (and gravity). I don't pin. I actually pin very little. One reason is I get carried away and I end up poking myself. I know, I know. I'm supposed to pay attention to how I lay the pins onto the top to keep from doing that. But I'll say it again...I'm lazy and truth be told, also a little impatient. Don't tell my boys I admitted that.
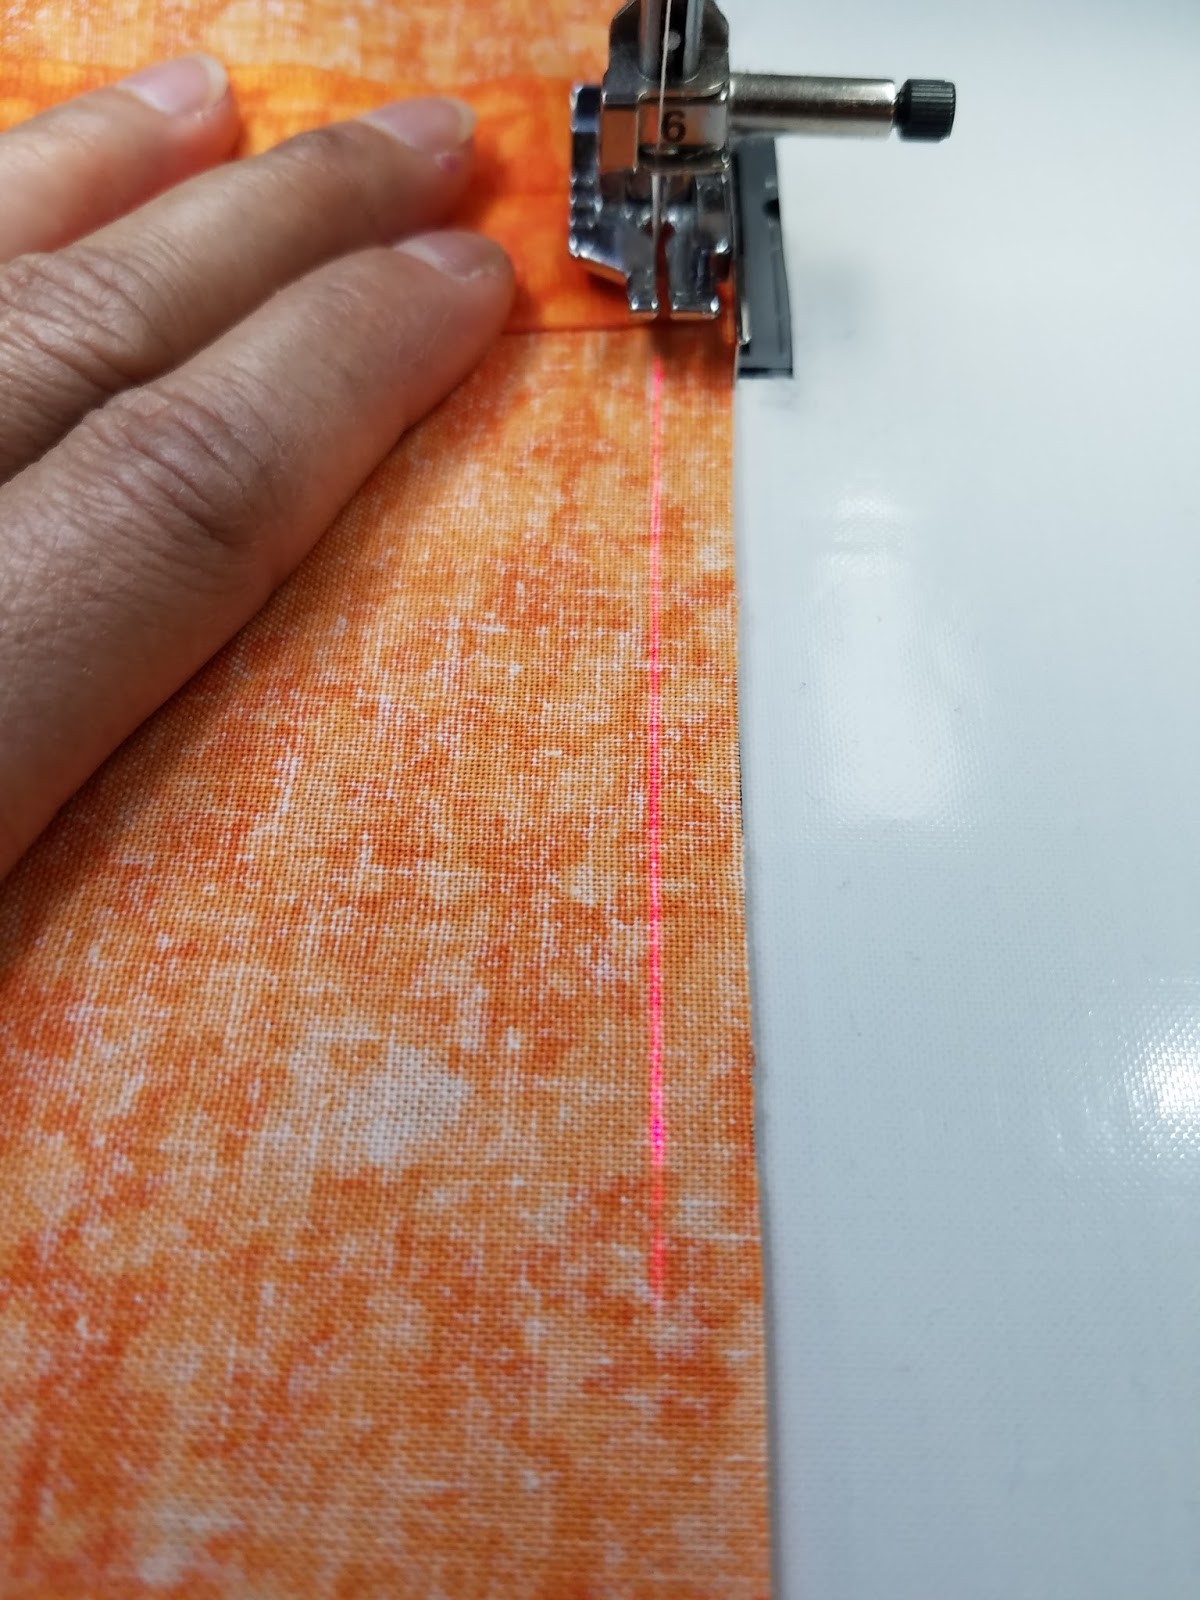
This is what I do. I use one pin to make sure the corners line up (and sometimes I don't even do that). I use my presser foot to help me hold the quilt top and strip together. I line up my edges, spread my fingers with my index finger close to the foot and my thumb as far away as I can get them. That holds a section of the sandwich together and I only sew that section between my index finger and my thumb. I keep repeating that until I'm done sewing the entire strip.

One nice feature (from many) about my Babylock Unity machine is the laser light (shown below). Using my quarter inch foot and the laser light, I can easily keep my edges pretty straight as I feed it under the foot. The quarter inch foot has a nice flat plate on the side to snug up the edge of the layers to (or not if I want a scant quarter inch). Another tip, I "lock" my settings (I have a lock icon on my display) when using this foot because it has a single hole for the needle to go through and I'm afraid I'll accidentally switch the stitch to say, a zigzag and bend or worse, break the needle. This is a real danger with a touch screen machine. I know this from experience! A needle breaking is very scary! So is sewing your finger with a needle. I'll tell you about that later.


Before I answer that question, I want to share another tip. It's really my short cut because I'm inherently lazy and I take as many shortcuts as I can. I've been known to reconfigure a pattern if I see a shorter (smarter?) way to piece it together. A lot of quilters that I know pin their layers together before they sew to make sure it lines up especially if they are sewing a long piece onto a huge top. The top tends to pull toward the floor because of the weight (and gravity). I don't pin. I actually pin very little. One reason is I get carried away and I end up poking myself. I know, I know. I'm supposed to pay attention to how I lay the pins onto the top to keep from doing that. But I'll say it again...I'm lazy and truth be told, also a little impatient. Don't tell my boys I admitted that.
This is what I do. I use one pin to make sure the corners line up (and sometimes I don't even do that). I use my presser foot to help me hold the quilt top and strip together. I line up my edges, spread my fingers with my index finger close to the foot and my thumb as far away as I can get them. That holds a section of the sandwich together and I only sew that section between my index finger and my thumb. I keep repeating that until I'm done sewing the entire strip.

One nice feature (from many) about my Babylock Unity machine is the laser light (shown below). Using my quarter inch foot and the laser light, I can easily keep my edges pretty straight as I feed it under the foot. The quarter inch foot has a nice flat plate on the side to snug up the edge of the layers to (or not if I want a scant quarter inch). Another tip, I "lock" my settings (I have a lock icon on my display) when using this foot because it has a single hole for the needle to go through and I'm afraid I'll accidentally switch the stitch to say, a zigzag and bend or worse, break the needle. This is a real danger with a touch screen machine. I know this from experience! A needle breaking is very scary! So is sewing your finger with a needle. I'll tell you about that later.

Back to the quilt top. To solve my alignment problem, I decided to make the back exactly match the front. Then I will sew another 5 inch border all around the back and use that as my alignment tool. See where I'm going with this? I'll make the 5 inch border stand out by using some strange color so I can see the edges very clearly. This will help me align the front to the back by using the corners and edges. Genius! Right?
I had to restrain my lazy side because I guessed wrong and didn't have enough of the first orange fabric I chose for the border. So I had to use the seam ripper which completely went against my laziness instincts. I almost convinced myself that it wouldn't matter if the color of the sides didn't match the top and bottom border. I'm not very fond of the seam ripper. But I'm also a little bit of a perfectionist and I really didn't like the picture in my head. So in the end, I sat on the floor, sang songs and seam ripped that color fabric off. It was for the best because I found an entire bolt of a prettier orange in my stash. So in the end, I am much happier with how it looks.

This is the finished back of the quilt. I still have to sew the 5 inch border, but I think it's going to look great once I'm done!

By the way, my longarm still isn't here! It should be here next week. I guess that's ok because I have another week to piece some more practice tops. I also volunteered to quilt a top for the guild (Rocket City Modern Quilt Guild) to have something else to practice on. I hope it turns out nice.
Happy quilting ya'll!
Comments
Post a Comment